- Understand the Different Types of Paint for Car Rims
When it comes to painting car rims, there are several types of paint available. Acrylic enamels are the most common and the least expensive option out there. They provide a durable finish and come in an array of colors. Lacquers offer a glossy finish that adds a touch of elegance to any vehicle. These paints need to be applied properly in order for them to look their best and last longer. Urethane paints are more expensive than acrylic enamel or lacquer, but also offer superior durability, scratch resistance, and chemical protection. Finally, powder coating is another popular choice for those looking for extra protection on their car rims as well as an attractive finish with plenty of color options. Each type of paint offers different benefits, so be sure to consider your personal needs before making a decision. When it comes to painting car rims, there is a type of paint that can perfectly suit your vehicle and enhance its look. With the right knowledge and care, you can make your car rims stand out from the rest.
No matter what type of paint you decide on, proper preparation is key when painting car rims. Be sure to clean and sand the surface thoroughly before applying any paint, as this will ensure a smooth finish. If you are looking for maximum durability, adding an additional clear coat after the base color is applied will help protect against chips and scratches over time. With the right techniques, anyone can make their car rims look brand new again.
So, if you’re looking to add a pop of color or give your car rims an extra layer of protection, there is a type of paint out there that will fit your needs. Be sure to research the different types and find one that works best for you. With the right tools and techniques, you can make your car rims look brand new in no time!
- Preparing the Rim for Painting
Once the surfaces of the rim have been prepared, it's time to start painting. Depending on the desired look, this could involve a wide variety of techniques and materials, from spray paint to brushwork to decals. Make sure you have all the necessary supplies before beginning any project—it’s much more difficult (and potentially hazardous) to stop in the middle when you don’t have what you need.
It's also important to consider safety gear such as goggles, gloves, and masks for both dust protection and proper ventilation should you be using aerosols or solvents. A drop cloth is also essential; make sure that your work area is free from dust and debris that could mess up your hard work.
When it comes to the actual painting process, take your time and do it right. Don't be afraid to experiment with different techniques and colors; you never know what creative effects you can achieve until you give it a try. Keep in mind that while some projects may appear simple on the surface, there is often more complexity than meets the eye—so don't be discouraged if something doesn't turn out as planned! With patience and practice, soon enough your rim will look like new.
- Applying Primer to the Rim
Applying Primer to the Rim is a straightforward but detailed process. Before you begin, make sure you have all the necessary supplies—primer, sandpaper, rags or shop towels, and a good-quality brush. When working with primer, it’s important to take your time in order to get an even finish on your car. Start by cleaning the rim of any dirt or debris that might interfere with the application of your primer. Pay special attention to areas around tight crevices and openings as these are most likely spots for trapped dirt particles. Once you’ve thoroughly cleaned the area, use sandpaper (at least 220 grit) to lightly scuff up the surface of your rim and remove any potential blemishes. Make sure to wipe the rim down with a damp cloth after you’ve finished sanding. Now it’s time to apply your primer. Shake the can of primer for at least minutes before use, then begin applying it in light, allowing adequate drying time between each coat (usually 30-45 minutes). After you’ve applied 3-4 light coats and given them adequate drying time, you’re ready to apply paint or other finishings! Remember that taking your time and paying attention to detail throughout this process is essential if you want a flawless end result.
- Selecting a Type of Paint for your Rims
When selecting a type of paint for your car’s rims, it is important to consider the specific purpose that you have in mind. If you simply want to add a bit of color and shine to your car’s wheels, then enamel paint could be an ideal choice. This type of paint is easy to apply and can last for many years with minimal maintenance. For more advanced detailing work on rims, such as changing the shape or size of a wheel, automotive epoxy paints are recommended for their durability and resistance to heat and weathering.
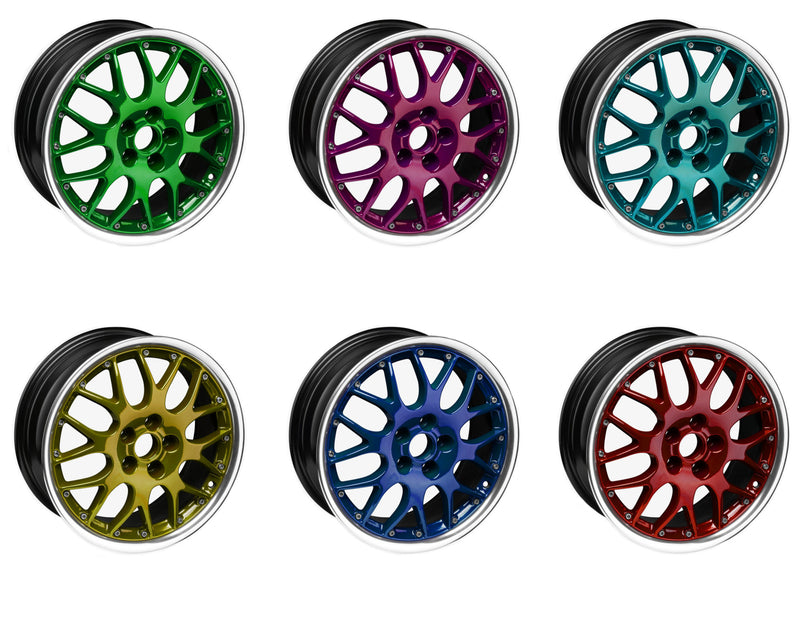
In addition to choosing the right type of paint, you should also select a color that complements the overall look of your vehicle while also reflecting your own personal style. A high-gloss finish will add a luxurious shine to your car’s rims, while a matte or satin finish can provide a more subtle look. Additionally, you may want to experiment with an array of colors to create unique patterns and designs on your wheels.
Before applying paint to your rims, it is important that the area is properly prepped and cleaned. This involves using sandpaper to remove any dirt and grime before wiping down the surface with rubbing alcohol. Finally, make sure to use the right type of primer in order for the paint job to last longer and look its best. With these tips in mind, you can ensure that your car’s rims are given the perfect touch of color and shine.
Before painting your rims, it's important to take some safety precautions. Make sure to wear protective gear such as goggles and gloves when handling any chemicals or paints. Additionally, consider using a respirator if working with aerosolized materials in an enclosed space. Furthermore, always work in a well-ventilated area and keep the paint away from sources of heat or flame. By following these steps, you can avoid any potential health risks associated with painting your car’s rims.
For best results, follow the provided instructions on the paint container carefully and use the recommended tools for applying the paint evenly. Additionally, make sure to allow enough time between coats so that each layer dries properly. With the right materials and technique, you can easily transform your car’s rims with a custom paint job that will help it stand out from the rest.
- Painting the Car Rims
Painting the car rims is a great way to give your vehicle an extra touch of personalization. It's a relatively straightforward process, but there are still some important steps to ensure the best possible results.
Before starting, make sure you have all of the necessary supplies. These include sandpaper (coarse and fine), primer, automotive spray paint in your desired color, a clear coat finish, masking tape or rust inhibitor, and a few microfiber towels. Additionally, it’s always wise to wear protective gear such as safety glasses and gloves while painting rims.
When setting up for the painting, be sure that the area you select is properly ventilated with no dust particles present. Also, double-check that the temperature is within an acceptable range (ideally between 65 and 85 degrees Fahrenheit).
Begin by using coarse sandpaper to remove any rust or corrosion from the rims. Wipe it down with a microfiber cloth before moving on to finer sandpaper for a smoother finish. Then, use your masking tape to cover up any surfaces you don't want to be painted.
Once the surface is properly prepped, apply primer to ensure that the paint adheres well and offers maximum protection against rusting. Wait until it has fully dried, then apply at least two coats of spray paint in long and even strokes. Allow plenty of time for each coat to dry completely before applying another one.
Finally, add a clear coat finish to protect the paint and help it last longer.
After letting everything dry completely, use a soft cloth to buff out any imperfections and give your newly painted car rims a smooth shine. Now you can show off your personalized rims with pride!
With proper preparation and attention to detail, painting car rims is an easy way to customize your vehicle's look without breaking the bank. With all of these helpful tips in mind, you’ll surely get the perfect paint job for your wheels.
- Finishing Touches - Sealing and Waxing the Rim
The next step is to seal and wax the rim. Waxing not only makes your rim look shiny, it also helps protect it from dirt and grime. Start by using a clean cloth to wipe away any dust or dirt that may have accumulated on the rim surface. Then, apply a thin layer of wax with a soft applicator sponge or a small brush in circular motions until you have achieved an even finish. Allow the wax to dry for at least two hours before buffing it off with another clean cloth. This will give your rim a glossy shine to make it look like new! Finally, you can use tire dressing if desired for additional shine and protection against UV rays. To finish off, simply reinstall the wheels onto your car. Your car will now look like it just came off the showroom floor!
Take your time and enjoy the satisfaction of a job well done! You have now completed the process of finishing touches - sealing and waxing your rim. The next time you are out for a drive, you can take pride in knowing that your wheels are properly protected from dirt, grime, and UV rays. Enjoy the shine and freshness of your new-looking wheels today! Congratulations on a job well done.
Similar articles
Which will you choose? ALLOY WHEELS or STEEL WHEELS?

During the 1960s, the concept of alloy wheels emerged. These wheels were made of either magnesium or aluminum. They were initially referred to as mags, which is the reason why... Read More
OEM WHEELS

Many people are wondering what the difference is between the replicas and the original wheels. Before you start talking about the condition and appearance of your wheels, it's important to... Read More
COMMON REASON FOR CRACKED RIMS

Although metal rims can be incredibly strong, they are also vulnerable to various road hazards. This is why it’s important to keep in mind that if your rim gets damaged,... Read More